Any savvy entrepreneur knows that quality product photos are one of the keys to influencing a customer’s purchasing intent. Flat lay is one such photograph style that has helped online brands create appealing visual product content for social media platforms and websites. Read on below to find out how to do a flat lay photography setup for your next product shoot.
How to do a flat lay photography setup for your product photos
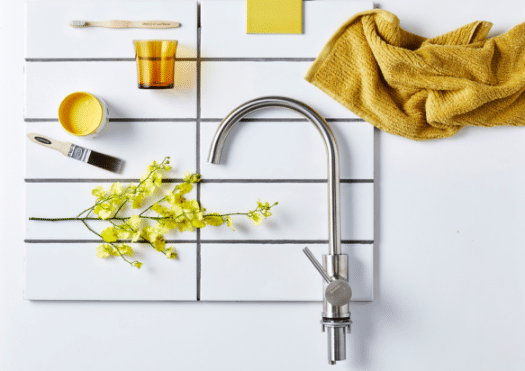
It’s the balanced and aesthetically pleasing arrangement of objects from a bird’s-eye view that makes flat lay a favourite, especially for capturing fashion, jewellery, cosmetics and food items. Your setup will play a significant part in pulling off a great product flat lay. Here are the things you need:
Tripod
You may have heard about investing in a good camera for your product shoots, but a high-quality tripod is just as important, especially for flat lays. You can also use a sturdy, heavy-duty C-stand alongside your tripod to hold your camera.
Camera.
When your camera is perched on a tripod, you can control it from your computer using a tethering app or a physical cable. Tether shooting helps you see the images on a bigger screen.
Flat surface and background.
You can use your table, desk, bed or the floor to shoot your flat lay. While plain white or neutral surface colours are popular and effective, don’t hesitate to experiment with different colours and textures. Try to match the background with the theme of your flat lay — you can have a wooden backdrop, corkboard, cotton, silk, etc.
Lighting.
You can use natural light or artificial studio lighting for your flat lay lighting setup.
- If using natural light, shoot close to a window. Put a reflector or a bounce board across from the window to direct the light back toward your products and soften sharp shadows.
- If using artificial light, tilt your studio light equipment diagonally toward your flat lay setup and soften the harsh light with a diffuser. You can use a bounce board or a reflector card here, too.
The goal is to have the objects well-lit so that the picture can capture every detail and minimise shadows.
Subject.
Your main item — the focal point of your picture — is your starting point to build your composition and visual story. It should be the biggest thing in your frame, so don’t let props and other supporting elements overpower it. You want the viewer’s eye to go where your main product is.
Composition.
Knowing the basic rules of photo composition (such as the rule of thirds, leading lines, focus, depth of field) is vital to pulling off the perfect flat lay shot regarding object placement. Here are more tips for this:
- Avoid overcrowding your image — the aesthetic of a flat lay is that perfect balance of minimalist and crowded.
- If you don’t know where to start with prop placements, use common layout shapes such as a C-shaped flat lay, V-shaped, S-curve, parallel lines, triangular or circular placements. Shapes naturally guide our eyes, so it’s best to place your props and other supporting elements in patterns mimicking shapes we see in our daily lives.
- Layering is also a fantastic way to add depth and movements in your photo. For example, you can layer a plate over another and add linen cloth beneath the stack.
Aesthetic imagery for your brand.
If you’re looking into enhancing the influence and reputation of your eCommerce business through professional photographs, contact us today.