Photographing drinks — especially cold ones and those in glass bottles — can be challenging. But when you do get the hang of it, drink photography can be fun and rewarding. Take cues from these tips on how to photograph drinks from professionals.
How to Photograph Drinks
Time to elevate your brand with these drinks photography tips. Our tips include drink photography lighting techniques to help avoid distracting reflections and pesky glares.
On Styling and Props
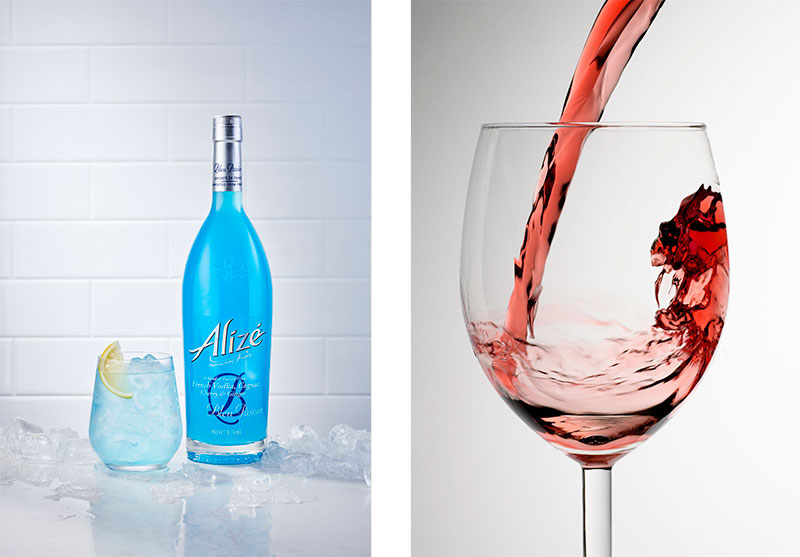
- Substitute liquids often work better (and are cheaper) for a cocktail photo than real alcohol — some red wines, for example, are too dark for pictures — opt for water mixed with red wine instead.
- How to photograph cocktails with a beaded look? Make fake condensation on the glass — all it needs is a 50-50 solution of water and glycerin.
- To make bottles look cold, dulling spray can be used. Spray it on and wait a few minutes before spraying lightly with water.
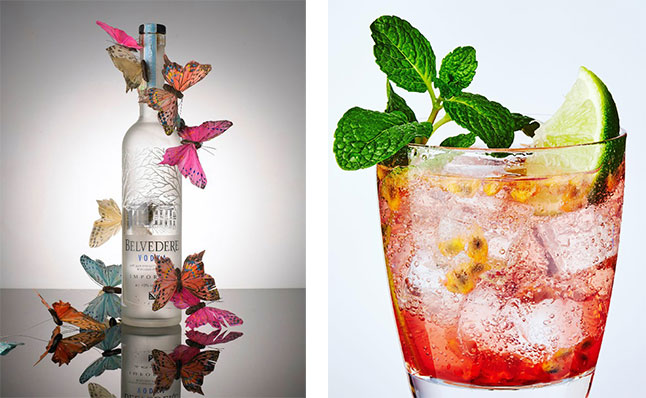
- Whether real or fake, use clear ice cubes — not pure white ice, as it can make the photos look amateurish.
- Natural elements like plants or flowers are ideal props to add to your image. Fresh fruits hint at the beverage’s flavour.
- An appropriate fill line for most drinks (besides wine) is around a quarter of an inch from the rim.
On Angles and Composition
- Use shapes to create a sense of movement or leading lines to help guide the viewer’s eye through the frame.
- Some attractive angles you can use for your photo:
- A 45-degree angle (as if the viewer is seated at a table and the drink is in front of them)
- Head-on at table level (with the glass sitting on the horizon line)
- Top-down or flat lay (perfect if the drink has a colourful garnish or if you have props like fruits and plants to accompany the subject)
- Use the rule of thirds to create visually pleasing spaces to place your subject.
- If shooting a single drink, get close to it. If shooting multiple beverages, use the rule of odds — an odd number is often more visually appealing and balanced.
On Lighting
- If opting for natural light, shoot in an area with a lot of bright but indirect sunlight (at a table close to a window, for example).
- Use sheer curtains or diffusion panels to soften shadows and prevent overexposure.
- Clean, white background and a glowy look? Backlight your image using a softbox against your table and shoot straight into the light.
- Backlighting will also eliminate most of those unwanted reflections.
- Take advantage of the drink’s translucent layer of condensation, as it acts like a light fog over the glass and eradicates reflections.
- Position a white reflector or foam board across from the window or studio light to bounce the light back onto your drink.
- If shooting on darker backgrounds, use white reflectors to brighten the edge farthest from the light.
On Taking the Photograph
- For depth of field:
- A shallow depth of field makes for a better photo with a clearer focal point for cocktail shots.
- A deep depth of field is recommended when shooting top-down.
- Use a deeper depth of field for action shots like pouring a drink to focus on the liquid.
- Cold beverages have only a few minutes to look their best before the ice melts or the garnishes wilt. So make sure most of the prep work and setup are done before pouring the drink to shoot it.
Contact eCommerce Photography Experts in Sydney
If you don’t have the time or resources to do product shoots for your eCommerce business, that’s where our team at JAM Photographic comes in. From offering product photography ideas to creating product packaging and merchandise photos, we can help boost your marketing and sales efforts. Let’s discuss your next project today.